Tuesday, November 27, 2012

Illustration for Kayak 42: War With America!


Kayak42_intro_CS4

Here is the Illustration I did for the latest issue of Kayak. The Issue deals with the war of 1812 and will be produced in English and in French.

I did this illustration by sketching it out on paper scanning it in to the computer and inking and colouring it in Illustrator. I then added some texture using Photoshop. The Issue will be out in December and will include the work of some very talented Illustrators. Alex Diochon, Fred Curatolo, Jessica Lindsay, and Keith Milne

Friday, November 2, 2012

Kayak Issue 42: War With America!

Kayak42_Cover_Web Here is a glimpse of the latest Issue of Kayak. Double the action, double the fun. Double sized Kayak! This issue is about the War of 1812, a forgotten war between Britain and America. In your mailbox and on the newsstand December 2012.

Tuesday, August 28, 2012

Kayak Issue 41 Otters

Kayak 42 Spread Illustration

Here is the opening spread for Issue 41 of Kayak. Teeka and Beau performing a play Shakespearian style. Illustrated using Adobe Illustrator and Photoshop for the finishing touches.

Monday, August 27, 2012

Kayak Issue #41: Canada On Stage

Kayak Issue 41 Cover

Kayak will be coming out on newsstands shortly. This issue focuses on the evolution of theatre in Canada. It is full of interesting facts, talented acting troops and famous actors from throughout the years. Inside you will find all this, coupled with illustrations from some of Canada's best Illustrators.

Our comic focuses on Cirque Du Soleil, one of my favourite performance groups in existence. Brought into existence by the talented Alex Diochon, who is up for a Manitoba Magazine Award (Maggie) for his work on this and many other Canadian history comics.

This cover is Done by Stéphane Boutin. You will find more of his work inside the magazine. You will also find the work of Tania Mignacca who is new to doing wok for Kayak. She has done some great work for our fiction feature on the start of the Stratford Shakespeare Festival.

For those who already subscribe, the magazine should be dropping in the mail shortly, for those who don't, keep an eye out at your local newsstand, and library.

I will be posting my artwork for the introduction of this issue shortly.

Please check out issue 41 of Kayak and learn more about theatre in Canada.

Friday, August 17, 2012

Barefoot or Bust

Vibram Five Fingers

Quite recently I have switched to minimalist running. About a year and a half ago I listened to a book tape called Born to Run. It is a fascinating, if not one sided story of a man and his search for answers as to why some people seem to be able to run forever without getting injured, and why the rest of us always seem to get hurt.

It is an inspirational book filled with interesting facts and even more interesting characters.

But before you strap on you huaraches (barefoot running sandals of the Tarahumara Indians).and try and run 100 kilometers. I have a few tips.

1. Be realistic

If you are like myself, and you have been running in standard running shoes for your whole life. there is going to be transition time needed. So dial down your distance and get used to the changes in your stride and let your feet toughen up a bit. 

2. Size matters

Someone who is 120 pounds might find it easier to slap on some minimalist shoes and giv'er a good 10k run no sweat. I however am about 205 pounds. That is a healthy, active 205 and I have to say, if you are capping 200 pounds you'll have to watch yourself. No matter what you do you are going to hit the ground with more force. This is not a bad thing as it quickly becomes apparent where things are uncomfortable and you can correct your technique at an early stage. My main issue is for the first couple of weeks my calves felt like I had inflated them with a bike pump. I was starting to get concerned, but with patience and rest they relaxed becoming accustomed to the forefoot strike I changed to from my original heel strike style of running. My calves have complained for a little while, but my knees and my back have been thanking me since I've made this change.

3. Turf wars

One of the most helpful things I have done to help condition my body to the changes in running style is to run on grass. I have a park close to where I live and I cut my distance from 7-10k down to about 2k. It may seem a bit drastic. But when I originally made the running style change, I tried to keep the distance similar to my old distances, and that I believe led to the increased discomfort of my calves. I have been doing this 2k circuit at the park for a number of weeks and recently I have been able to increase my distance to 4k. I am now alternating park runs with pavement runs as well. The great thing about running on grass is you can ditch the shoes entirely if you like. Although, I have been cautioned by a friend that stray nails and broken pieces of glass have been known to lie in wait in many a field. So go barefoot at your own risk. I generally keep my shoes on.

4. Patience is a virtue

Everybody is different and is going to develop at a different pace. This style of running is not going to make you some kind of superman. However I believe the benefits described in Christopher MacDoogall's book Born to Run are worth a little time and effort. All aches and pain I have experienced have been based on my misconception of what my body can do and how long it would take for it to adjust to minimalist running.

In the picture above you will see my Vibram Five Finger KSO's. These are just one pair of the many minimalist shoes that are being produced. They look goofy but as the name suggests they fit like a glove. You can find minimalist shoes that look more like standard runners from companies like Brooks, Merrell and New Balance.


For those of you interested in running and wanting to try something new, or in this case new/ancient (modern running shoes have only existed for about 40 years) pick up Born to Run, see what you think and if it strikes your fancy, give this style of running a try.


Stay golden Ponyboys and girls


Thursday, August 9, 2012

My First Man Bow

My first bow 7

My first bow 10

My first bow 6

My first bow 1

So here are some shots of my first primitive style bow sized for an adult human being.

About a year ago I decided I wanted to try and build a bow that was primitive in nature. I did not use hide glue, and I did not use sharp edges of rocks to shape this bow. Thus my reference to this being a primitive "style" bow.

I went out last year and cut a small tree from the river bank near where I live, debarked it, and let it season for a couple of months. I then used a hatched to rough out the basic shape and use a rasp to shape out the rest of the bow.

It took a long time, but what else are you going to do a 10PM at night during a Canadian winter.

I almost broke it trying to flex it at an early stage and so I figure I lost about 20 pounds of draw weight. I had some wood split up on the back of the bow and had to use a drawknife to remove some serious wood. I then salvaged the bow by laminating rawhide onto the back to keep it from braking. I also added some  elk antler overlays to the tips.

It has held up and shot a couple hundred of arrows so far. I need to build some arrows specifically for it as I only have my hunting arrows I use for my 50lb fiberglass bow.

There are many flaws with this bow. Knots, some holes in the wood, imperfect tiller. I attribute a lot of the success of this bow to the length I made it. Seventy two inches of height really spreads out the amount of pressure on the limbs.

I only ever expected this bow to blow up in my face. So I have to admit that after a year of toiling, reading, and watching youtube videos into the wee hours of the morning, it is quite a relief that I got to shoot some arrows with it. I do not know how much longer it will last, but I am confident that I will make better bows in the years to come.

I would like to thank Professor Roland Bohr who I have had the good fortune to become acquainted with for his encouragement and all the knowledge he has shared with me.

I will post shots of some of the kids bows I have made for my nieces and nephew over the past summer. I will also take some glamour shots of my elm longbow and maybe post a video to YouTube so people can have a look at how it shoots.

Stay golden Ponyboys and girls.

Wednesday, August 8, 2012

Home Brew at Last!

First Batch of Beer 1
Preparing to transfer the beer from the secondary

First Batch of Beer 2
Sterilizing the transfer tube

First Batch of Beer 3
Starting the transfer process to clear the sediment from the secondary.

First Batch of Beer 4
Bottling the tasty brew

First Batch of Beer 5
The finished product, a tasty brew ready for storage... and consumption.

I started Brewing my own beer recently.

My gorgeous and loving wife got me all the gear to brew the beer this last Christmas, but I was short bottles. This proved not to be much of a problem since I have two qualities I'm proud to brag about. Patience and a love of Grolsch. Some do not enjoy this brand of beer, but I do, and lucky for me because some 48 reusable pint bottles later I am now capable of storing my craft beer.

It takes about a month to sort out your brew but as I have discovered, it is worth the wait. My First Batch was an English Bitter kit from Coopers. It was a bit green when I first tasted it but it has sit for about two months now and has a fine flavour enjoyed by all who have tried it.

The exciting thing about home brewing is the variety of beers you can make and it not a bad way to save a few bucks. I've just got in touch with an old friend who is going to help me score some quality beer kits from the states that are otherwise unavailable to Canadians. I'm very excited to get me hands on Dead Ringer IPA produced by the company Northern Brewer.

I'm happy to help carry on my fathers legacy of home brewing. I've watched him make his own beer for about 20 years and I've always wanted to do it myself. Well now I have, and I feel like a whole new world has opened up to me. One of barley, hops and yeast.

Drink up fellow brewers, life is good.

Monday, July 23, 2012

Pooh Bear Finished

Pooh Bear Egads that took a while. Sorry for the lack of posts. I've been a bit occupied with some projects that I will post about soon.

Thursday, May 31, 2012

Pooh Bear Sketch

Pooh Here is a sketch I am working up in colour. It just popped into my head, and I could not get it out. So I had to draw it. Winnie the Pooh and Christopher Robin together fornever.

Wednesday, May 23, 2012

Little Drummer Boy: Sean Quigley

Little Drummer Boy


A couple of weekends ago I was attending an event at the Manitoba Museum for work and cake. While there, I met Sean Quigley. Most of you have probably seen his video for The Little Drummer Boy. If not I have embedded it into this post. We were chatting and I was doing some kids drawings of otters on a white board. Sean is a very outgoing man and asked... nay, demanded that I do a caricature of him. Well here it is. I wish I had timed myself but I can tell you it did not take that long. He was very happy with it. I feel I could have made the eyes a bit more accurate but all in all I'm happy with what I have done. I will also add that Sean is a very nice guy and was a pleasure to draw.

Monday, April 30, 2012

My Axes

My refurbished axes 2 My refurbished axes 4 My refurbished axes

Here is the last post for tools and such that I have refurbished in the last year. For those of you who come here to see my art. Worry naught, I will be posting some new stuff shortly.

About a year ago I decide I needed an axe.

I have a fire pit in my back yard but nothing to process wood with. So I put it out to the universe. I says "Hey universe, I need and axe." Well ask and you shall receive. My father-in-law just happens to have a couple of of old axes he can spare me.

As anyone who cares to spend the time researching knows some of the best hand tools in the world are made in Sweden. You can get affordable yet well made stuff like Mora's, or you can get boutique stuff like the Gransfors Bruks axes. Now I can not justify paying the price it costs to get one of these axes. They are hand forged and of great quality. Maybe when I'm fifty and a bit more financially stable I can get myself one. But the truth is I don't imagine I will need to. As it turns out the axes that my father-in-law provided are both of Swedish make. HB of Sweden (Hults Bruk) has been making axes for about 300 years. If I take decent enough care of these axes I should be able to pass them along to my children when they are old enough.

That is the great thing about refurbishing old tools. They just don't make them like that anymore. It sounds cliche, but it is true. In an era of forced obsolescence companies won't produce something for under 80 dollars that will last. So the best option is to find tools that were expensive 40-50 years ago, buy'em cheap clean the rust off sharpen them up and blammo you have a quality tool that will last another lifetime.

The axes you see pictures of here are my felling axe (large), my Scandinavian style forest axe (medium), and my hatchet (small).

This ends the bulk of a lot of personal projects I've had doing, so it may be some time before I post any more craft stuff. In the mean time I will be posting more artwork and that sort of thing.

Stay golden Pony Boys and Girls.

Thursday, April 26, 2012

Mora Knives and Nature

Mora's and Hatchet 2
My camping knives.

 Mora Clipper
My Mora Clipper.

Frost Mora from the 50s with custom sheath
My vintage Mora with birch handle.

Around the same time I developed my interest in archery I started to watch the series Survivorman. I know this series finished quite some time ago, but I don't have cable so you would be surprised how many television shows I have not watched. However I got a hold of the 3 seasons, and man it opened up a whole new world to me. It rekindled the interest I have in the wilderness and the skills I need to survive and be comfortable in nature. Les Stroud (Survivorman) focuses on extreme situations but because I worship his show and what he does I have come across some other individuals who have inspired me to maintain and learn more about nature and how to experience it in a safe and respectful manner. Ray Mears is another individual who I watch and respect greatly. He is a British survival expert who focuses a bit more on Bushcraft (the skills needed to live comfortably in nature). The third individual is Dave Canterbury a survival expert who focuses on North American frontier style living, which includes archery, black powder rifles and self reliance skills. He has a vast youtube library where he shows you a plethora of skills for free.

The pictures I have posted are of my camping knives. When I got interested in doing some outdoor camping activities all these experts (Les, Ray and Dave) agree a knife is essential for anybody trying to practice primitive or survival skills. I chose to get a Mora knife which is a wonderful brand made in Sweden. They are very tough and reliable and very affordable. You can pick one up from MEC or Lee Valley for under $20 dollars.

The Mora Clipper is my main camping knife it has a synthetic handle and a synthetic sheath. I have beaten the living bejeezus out of it and it is still sharp and functional. 

The second knife is one my father-in-law gave to me, it used to be his when he was a kid. It is also a Mora which bodes well for the craftsmanship of the company (the knife is roughly 40 years old). It was pretty dull and beat up when I got it but I sharpened it, sanded and oiled the handle and made a moulded sheath that holds the knife using friction. Meaning that I do not need a strap to make sure the knife doesn't fall out of the sheath if inverted. It was my fist attempt at this kind of sheath and I'm quite happy with how it turned out. As per my father-in-laws request, I will hold onto this until my daughter is old enough to use a knife and give it to her as her first camping knife.

Well enough of my nature/knife nerd-out. Thanks for stopping by I hope some of you find the time to get out and enjoy some of the natural spaces you have at your disposal. I know I will.

Monday, April 23, 2012

Well Bow Me Down!

Lilly's first bow
Jute twine bow handle
Primitive kids bows
Primitive kids bows 2
Primitive kids bows 5
Primitive kids bows 4

A couple of weeks ago I constructed my very first fully functional bow.

This is the culmination of a year or more of obsession. About a year ago I was doing some research on the Plains of Abraham. While researching the look of a french musket on youtube I noticed on the suggestion sidebar that there was a video on the English longbow. This set off a chain of events that has led me to purchase a longbow and recurve bow in the last year.

On top of taking up archery, I have developed a healthy amount of knowledge of how to make my own primitive bow. Now, all the knowledge I have is theory gained from reading books like "The Traditional Bowyers Bible" volume one and two, "Bows and Arrows of the Native Americans" and a heap of youtube videos. I have to admit that without youtube my ability to understand what I have been reading would have been greatly limited, but fortunately for me that was not the case and the information so generously provided by people around the world has allowed me to successfully construct this bow.

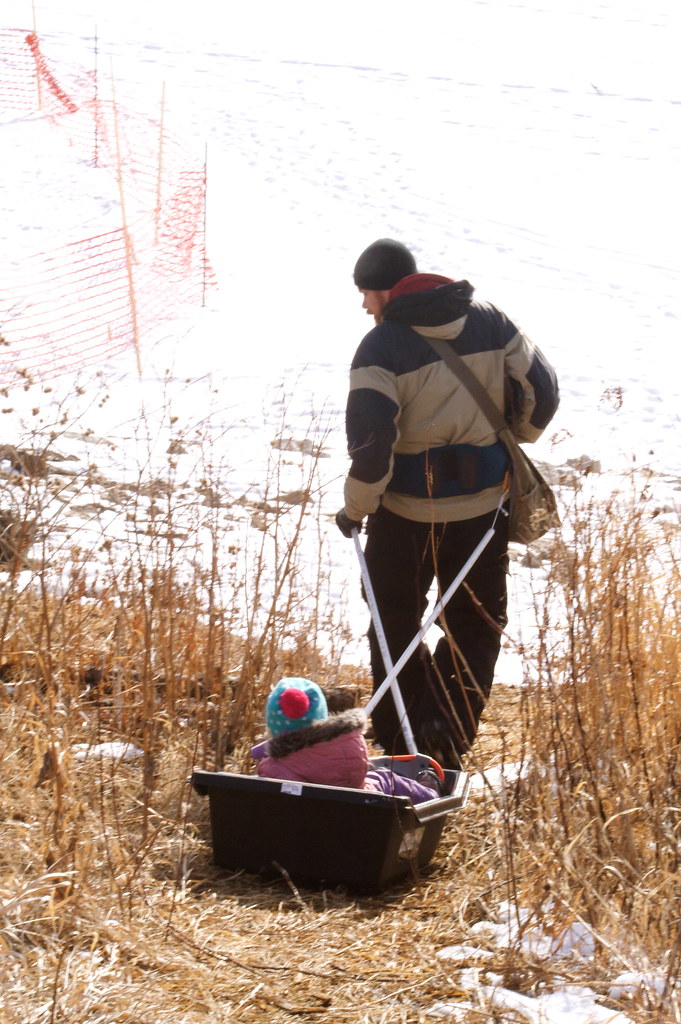
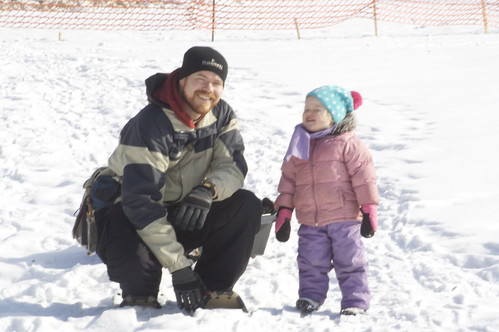
In truth it is not a bow for me. It is a bow for my daughter who is two and a half years old. Wah... wah... waaaaaaa....

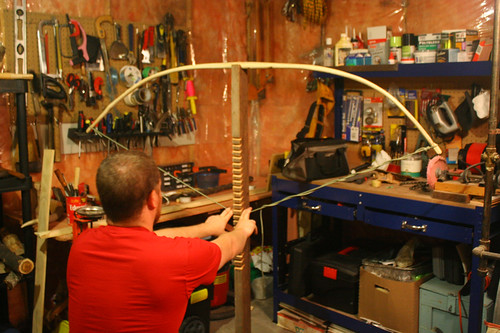
Before you are too disappointed, let me tell you this is one heck of a bow. It has truly exceeded my expectations and has given me the confidence to continue and build larger bows.

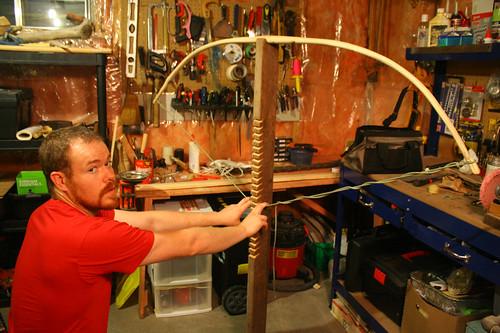
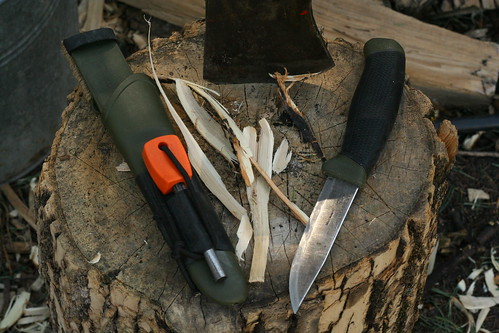
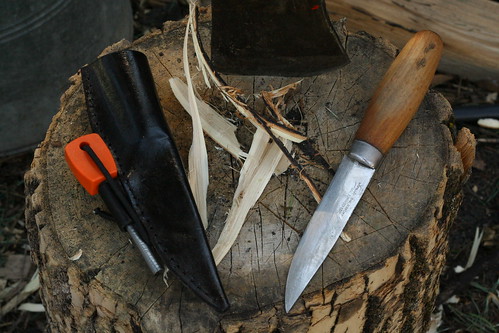
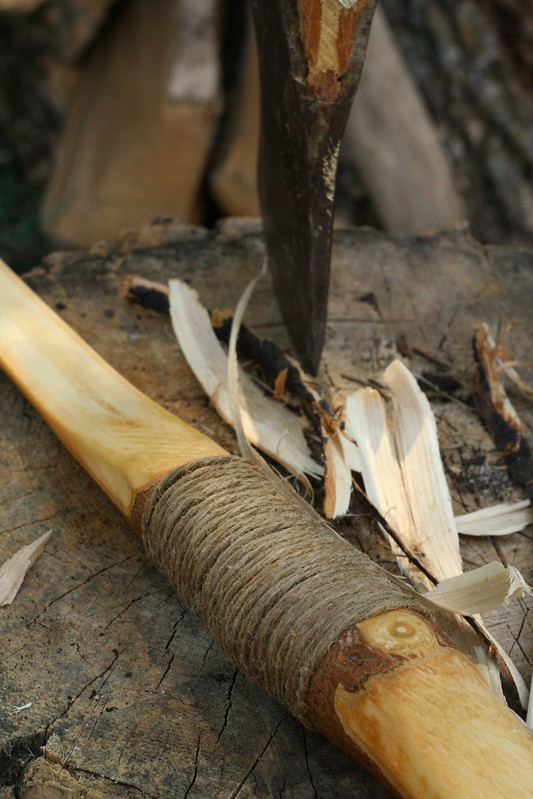
It is made from what I believe to be poplar. I cut it about 4 years ago to make a walking stick and it had been seasoning in my parents garage for all that time . The other day I was over for the afternoon and had some spare time so I grabbed a hatchet and an 
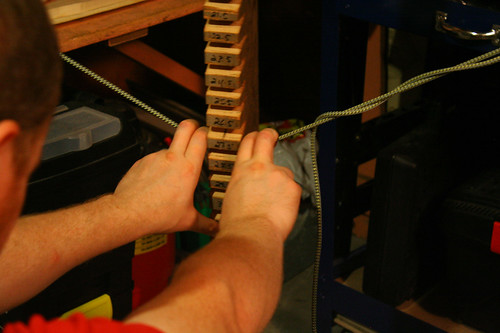
Opinel knife and went to town on the wood. All in all it probably took me about 5 hours to figure everything out and get it shaped up. I then wrapped the handle with jute twine and used waxed nylon cord to make the string.

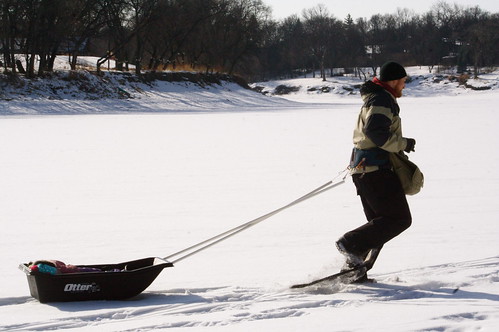
Like I mentioned earlier, once I put a string on this thing I was not disappointed with its performance. I tested it out using plastic arrows with suction cup tips that belonged to a dollar store bow we bought for Lilly some time ago. Well let me assure you they all rest in pieces. This thing shot them so hard they literally shattered on impact when they hit the wall I was shooting them at.

Needless to say I'm holding off giving this bow to Lilly until she is older and I can build her some arrows that can withstand the bows power.

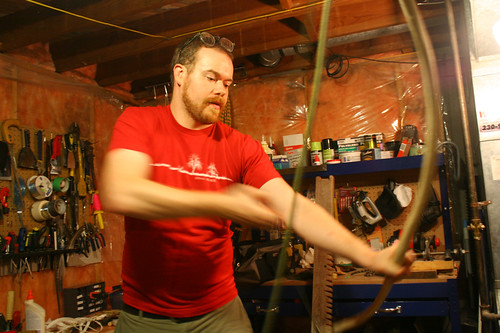
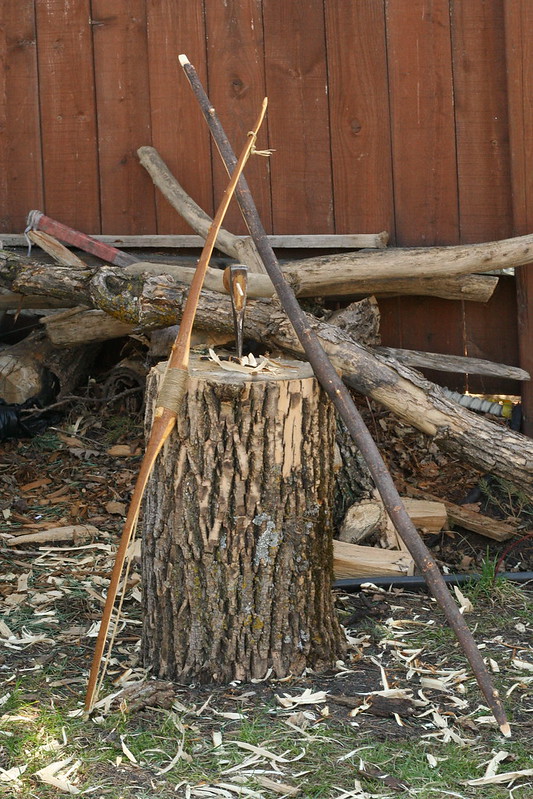
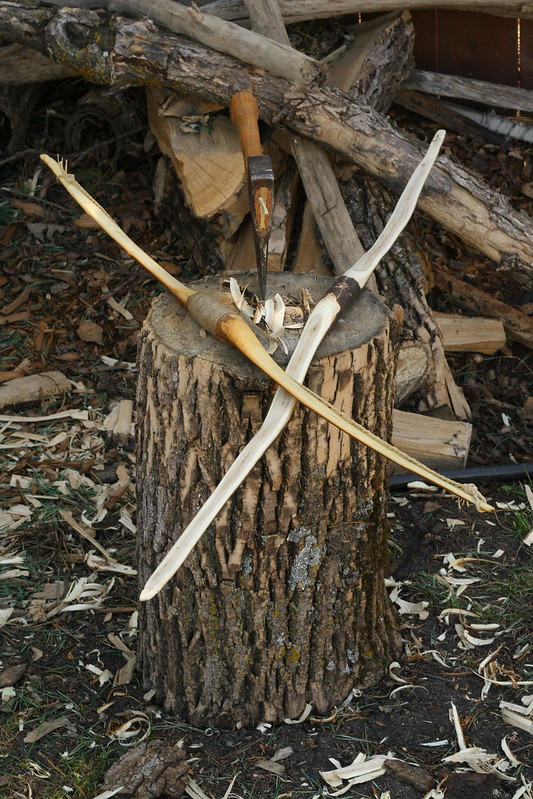
If you could have seen the grin on my face when I realized that this thing worked. So proud. I have already started on my next bow which is slightly longer than my first attempt. My first bow measured in at 36" and my next which is made from oak gathered from the riverbank is about 43" long.

In my haste I have already come up against some obstacles. Number one the wood is green and unseasoned. My fist bow was very easy to make because the wood had such a balanced strength to it due to the amount of time it was given to shed its moisture. The wood I am currently working with still has a fair amount of soft flex to it, and will need to dry longer before I put the finishing touches on it. If I can maintain my patience and not muck about with it too much, it should get stronger and easier to work with as time goes by.

I'll keep you posted on the progress.

Stay golden Bony Boys and Girls.

Monday, April 9, 2012

Kayak Issue #40: Titanic Spread

Kayak: Introduction Spread

As I mentioned before I produced a two page spread for the most recent Issue of Kayak.

It is of the two otters (Teeka and Beau) exploring a shipwreck. I had a blast doing this though it does ad a bit of stress to designing the magazine as well as producing illustrations. But the truth of it is, it wasn't going to happen without the pressure. The illustration really didn't come together until I added the bubbles. Once those were added it really said "Hey, we're under water!" Which is great because prior to that the image looked like a bunch of fish with two otters floating in zero gravity.

I did the main illustration in illustrator with some colour correction and texture work in photoshop.

Tuesday, March 27, 2012

Kayak Otters

Kayak Otters

These are two characters I developed for Kayak .

They are the new ambassadors of Kayak magazine to Canada's young and impressionable. I chose them because many of our national emblems have been used so many times. We had a Beaver mascot who did not grab the hearts and minds of our readers. We've tried Moose which I am totally against. Not because I dislike moose but because anthropomorphic rendering does not lend itself to such a majestic animal. They always look goofy and ridiculous. They are not. Moose are huge, and I mean huge majestic animals. To round their antlers make them seem sweet and cuddly does a diservice to them, it also makes people more ignorant to the danger they can pose as wild animals. I simply did not want to do to the moose what Disney has done to the Hippo.

I considered the Lynx, raccoons have been done. Then I thought, maybe otters. Playful, river creatures that can stand on their hind legs and lend themselves to looking a bit more like humans and the ability to wear historic costume if need be. I absolutely love the response so far. It ranges from complete acceptance to confusion followed by acceptance. I have yet to meet a person of despises otters. I myself am a big fan of them. Their names are Beau and Teeka and I hope you like them, because you will be seeing a lot more of them in upcoming Kayak issues. My first two page spread in the magazine was done introducing Beau and Teeka. You will find it in the current issue of Kayak due to drop in the mail shortly. It will be on the newsstand in April.

Monday, March 19, 2012

Kayak Issue #40: TITANIC

Kayak40_TITANIC
So here is latest issue of Kayak. This one is a very exciting issue jam packe with information about the Titanic, and many other watery disasters that have taken place around Canada. I'm not sure what it is about shipwrecks that capture our hearts and minds but I'm hard pressed to find a person who isn't fascinated when they come across the weathered hull of a ship on a beach.
I don't come across near enough of those in the prairies.

The artists in this Issue are Charlene Chua for the brilliant cover, David Namisato for the fiction story, Alex Diochon came through with an amazing visual telling of the song The Wreck of The Edmund Fitzgerald by Gordon Lightfoot. And myself. Yes that is right, I finally organized myself well enough to get a proper illustration done. It involves some new characters being added to the Kayak roster. Beau ad Teeka. I'll talk about them in some future posts. The magazine should drop just prior to April, and you will find the magazine on newsstand from April-May, or at your local library. If you don't have Kayak at your local library please request it.

Wednesday, February 29, 2012

Ski Pulk

IMG_3890
IMG_3894
IMG_3912
IMG_3904
IMG_3924
One of my latest projects has been the construction of a ski pulk.

SKI PULKS: sleds towed with a harness and rigid poles

I have to say I'm quite impressed. I made mine a bit more heavy duty than usual but it is for pulling my daughter not supplies, so that can be forgiven. The Main benefit of doing it myself is that it would have cost me between 250 - 300 dollars to buy one and I got mine done for about 80 dollars. And it is not a hard thing to put together.

If you live in a snowy area and you would like to try to build one. Here is a link to a make your own ski pulk booklet. I have to give a tip of the hat to the ski pulk company for offering this booklet. They obviously understand not everybody has the money to buy their products which have a very specialized audience.

The harness is a backpack waist strap bought for 25 dollars from MEC. The carabiners combined cost about 8 dollars. 50 cents for the D rings. 4-5 dollars for 15 meters of Paracord (which has a little too much give) which will have to be replaced with another kind of cordage. And last but not least the sled (hunting/icefishing sled) cost 40 dollars. All you need is a drill to make some holes in the edge of the sled and lace the rope through.

I have not had a chance to try it with skis yet. I'll do that this weekend hopefully. but with snowshoes with crampons I can pull my wife and my daughter, at least for a little while.

Tuesday, February 28, 2012

Hunting Knife Sheath

Hunting Knife outside of sheath
Hunting Knife in sheath
Hunting knife and hatchet
This is a hunting knife sheath that I put together as a gift for a friends brother-in-law. I used tooling leather and neats foot oil for a natural finish. I sewed it using nylon sail thread and some rivets.

I moulded the leather for a friction hold. which means the knife will not slip out of the sheath if inverted. I did however ad a safety band with a snap just in case.

I think it looks really rugged. I have posted a shot of the hatchet and the hunting knife together. The hatchet sheath uses a much lighter leather and it did not take the oil anywhere near as well as the tooling leather. So note to self, vegetable tan tooling leather is the bomb.

I have one more craft project to post and then I am back to artwork and such.

Saturday, February 25, 2012

Refurbished Hatchet

Refurbished hatchet in sheath
Refurbished hatchet beside sheath

I like to fix up old tools, especially old axes. I also like to make stuff out of leather. So when a friend had a beat up old hatchet with a smashed handle covered in paint. I took the opportunity to replace the handle, re-sharpen the head, and remove the paint on it. I then made a Gransfors Bruks style sheath to protect it. It was a fun little project. I have also refurbished a felling axe and made a scandinavian forest style axe. I have not taken photos of those yet.

Friday, February 24, 2012

Friar Tuck Finished Painting

Friar Tuck

So here is the final product, I'm pretty happy with it. Still a lot of work to do but I can feel my sense of being able to create depth in an image using colour value. This makes me want to do some more Robin Hood characters. I can add it to the list of things I would like to do I guess. The chicken sure does look delicious though.

Thursday, February 23, 2012

E.T.

ET_web

Just a picture of E.T. Done in my spare time. I don't particularly like the movie E.T. I don't hate it either. I like the look of the little extra terrestrial though. So I drew him. Please disregard the fact that Elliott is spelled with 2 t's.

Thursday, February 16, 2012

Voyageur

Voyageu1_web

I have recently become interested in the romanticized existence of the voyageurs. Their life in reality was a brutal existence of never-ending servitude that often resulted in a broken human being. But if you take all the pain and strife out of it and think about getting to canoe all day it seems pretty cool. The truth is actually somewhere in the middle of these two statements. Either way, voyageurs are a fascinating stereotype and I have been drawing them lately.

more to come.

Wednesday, February 15, 2012

Sloth

Sloth
I have a bunch of sketches to post from my moleskin. Just kept forgetting to scan them into the computer. Here is one. It is not really a representation of how I was feeling since lately my health has been good, and I have been feeling rather un-slothful. It has more to do with being saturated with images of Sloths. Strange but foe a week or so I just could not escape them. Be it facebook posts, David Attenborough documentaries or novels like Life of Pi.

So I ended up sketching one.

More to come sketch-wise, and soon some progress on my Dr. Grorbort's creature.

Stay Golden Pony Boys and Girls.

Friday, February 10, 2012

Dr. Grorborts Creature Contest

Dr Grorborts Creature Challenge

So I'm on facebook the other day and I happen to have liked Weta Workshop. One of their posts is for a contest put on by none other than Dr. Grorbort himself. Create your own alien. I thought it would be fun so hear is some early progress of some different silhouettes I could work up into some different concepts. If anyone wants to join in the competition you can sign up here.

I just scanned a bunch of sketches and have the final of my Friar tuck to post so I'll start all that up in the next little while.

Stay golden Pony Boys and Girls

Wednesday, February 1, 2012

Friar Tuck Drawing

Friar Tuck

The Winnipeg Art Group started another art project Similar to the monster poster that I did the Ramnoceros for. This time I am drawing Friar Tuck. Although this is the original medieval Friar Tuck I have modeled the feast he is having after the "Rocket Robin Hood" Friar tuck. I am in the midst of painting him and I will post the finished product as soon as I am done. I will try to post some more sketches soon and some samples of leatherwork and carving I have been working on.

That is all for now.

Stay golden.

Monday, January 30, 2012

Kayak Issue #39: Canada And A Better World

Kayak39

Here is the latest Issue of Kayak. It is a Special Double Issue about Canada's role in international development. It is jam packed with information about organizations and people who have made difference around the world.

It is also jam packed with art from very talented Canadian artists: Stéphane Boutine, Anthony Brennan, David Namisato, Keith Milne, Dena Seiferling, Alex Diochon, and Brendan Hong.

The magazine will be on Newsstand in February and has been produced in English and French.

I will be posting some more sketches and personal work in the near future.

Stay golden Pony Boys and Girls.